How to integrate Salesforce with the floor plan
ExpoFP can integrate with the customer relationship management platform Salesforce. When an exhibitor reserves a booth on the floor plan, an account and an opportunity are automatically created in Salesforce, allowing organizers to complete the sale on the Salesforce side.
How it works
An exhibitor looks at the floor plan and selects a booth. The reservation button redirects them to the purchase page. There, they fill in contact and company information, select extras and sponsorships, and click Reserve. After that, ExpoFP creates both an account and an opportunity in Salesforce.

The account that is created contains the information that the exhibitor filled in on the purchase page. All the items purchased by the exhibitor are listed in the description. All exhibitor accounts can be found in Community - Accounts.

An opportunity is created each time an exhibitor makes a purchase. It is linked to the exhibitor's account. All opportunities can be found in Marketing - Opportunities.
If the exhibitor already has an account, the integration does not create the second one. It just adds another opportunity and links it to the old account.
How to integrate a plan with Salesforce
You can request integration with Salesforce for any paid plan at no extra charge. After the process is completed on our side, organizers need to create a connected app for ExpoFP. Here are the steps:
- Open Setup, search for apps
- Click App Manage
- Create a new connected app

Specify basic information about the app in the “Basic Information” section, including the app name, logo, and contact information.
Connected App Name: ExpoFP connected app
Contact Email: support@expofp.com

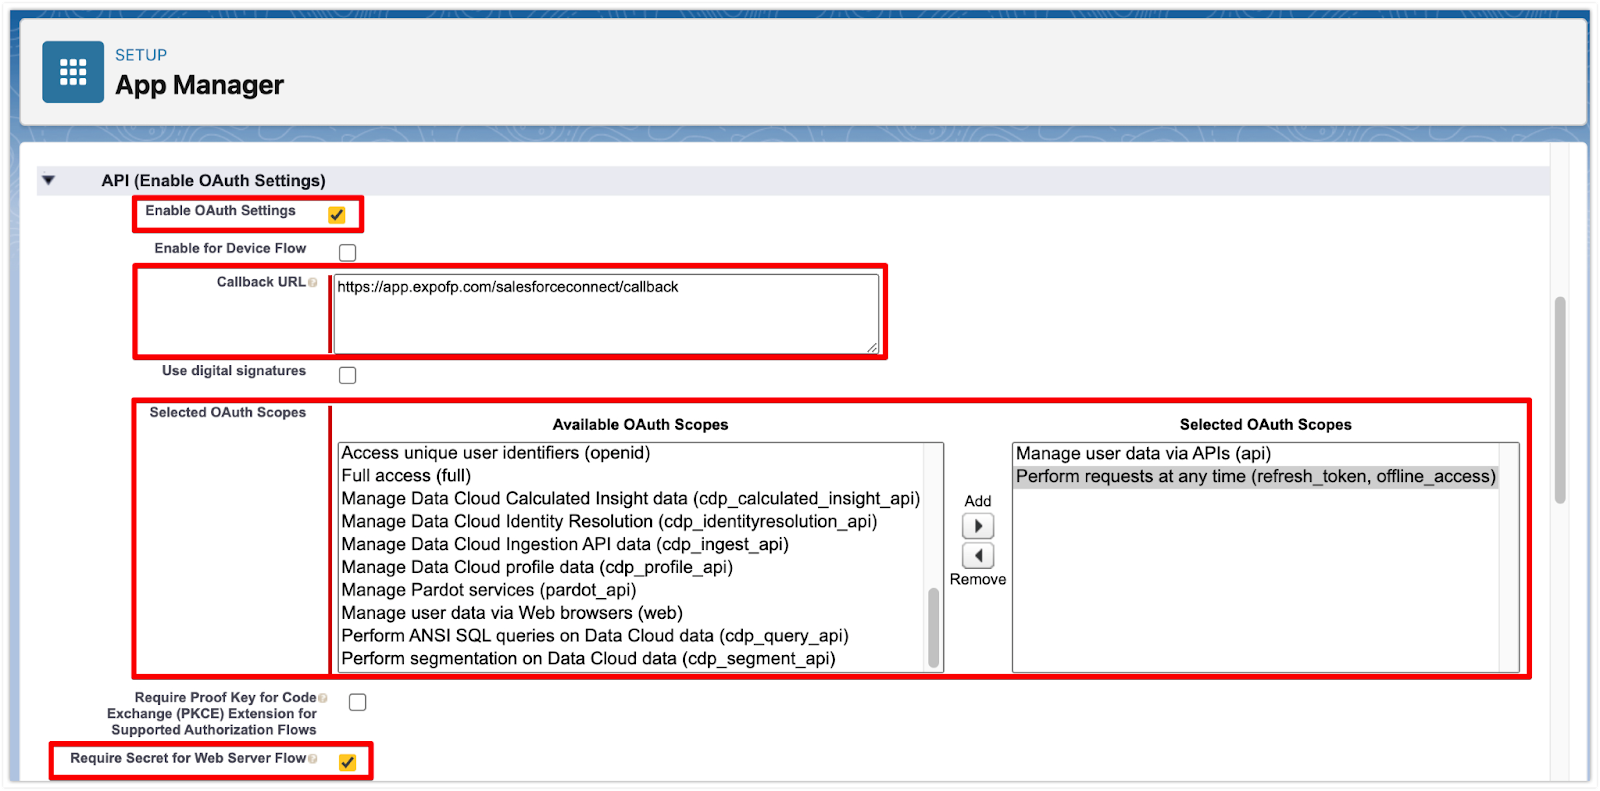
Enter the “API (Enable OAuth Settings)” section and fill in the details as shown below:
Enable OAuth Settings: checked
Callback URL: https://app.expofp.com/salesforceconnect/callback
Selected OAuth Scopes:
- Manage user data via APIs (api)
- Perform requests at any time (refresh_token, offline_access)
Require Secret for Web Server Flow: checked
Click Save. Then click Manage Consumer Details.
You will see a consumer key and a consumer secret.
After that, let us know that the setup on your Salesforce side is complete and ExpoFP will give you a link where you will enter both keys and click Test.