How to use exhibitor categories
Exhibitors can be assigned to different categories for easier navigation on the floor plan. Categories allow attendees to sort companies by products or services.
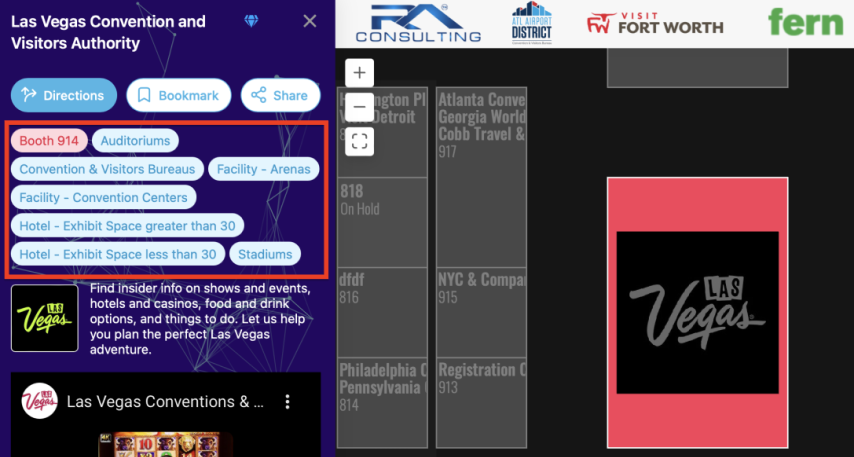
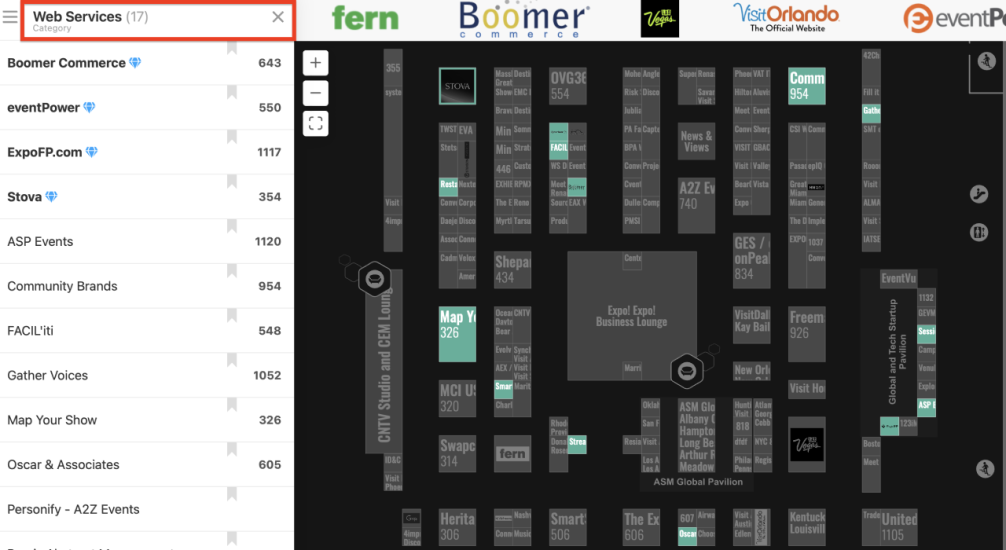
Attendees can search for a particular category. All exhibitors within this category will be highlighted on the floor plan:
Displaying categories
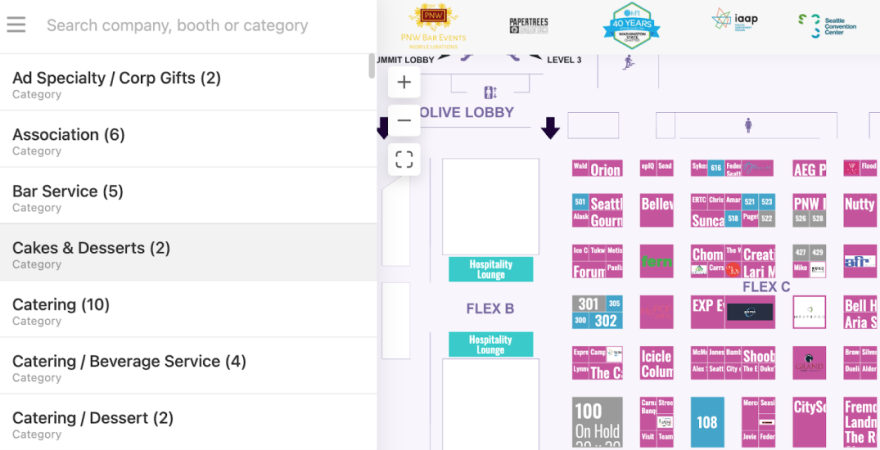
By default, categories are hidden behind a "hamburger" tab on the view. They can also be displayed on the exhibitors list at the top.
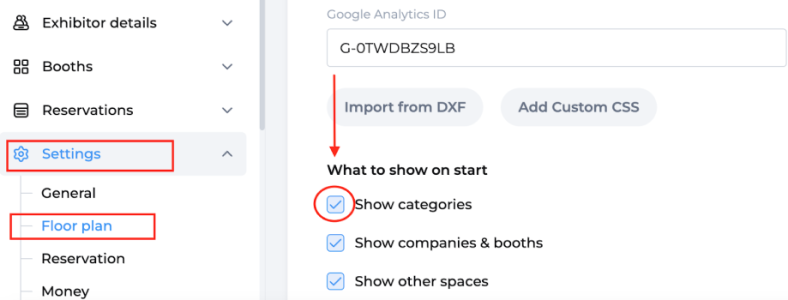
To set it up, go to Settings  - Floor plan and check the Show categories box under the "What to show on start” section.
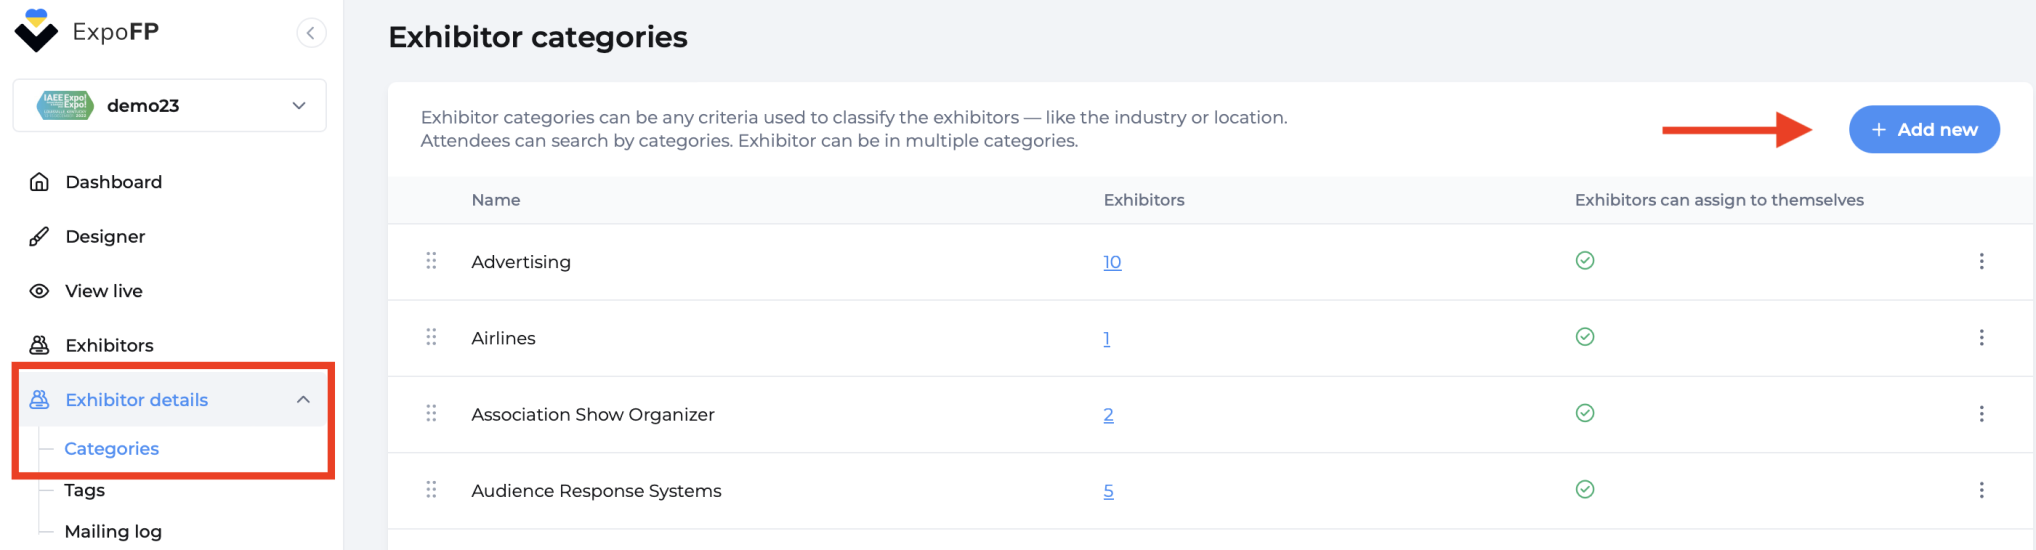
Adding categories
You can add, edit, or delete exhibitor categories in Exhibitors  - Categories. To add a category, click on the Add new button:
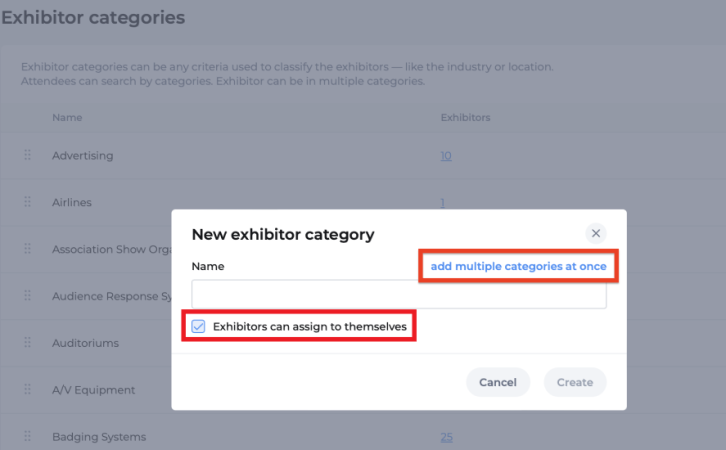
You can also add multiple categories at the same time. To allow exhibitors to assign categories themselves, check the corresponding box in the pop-up window:
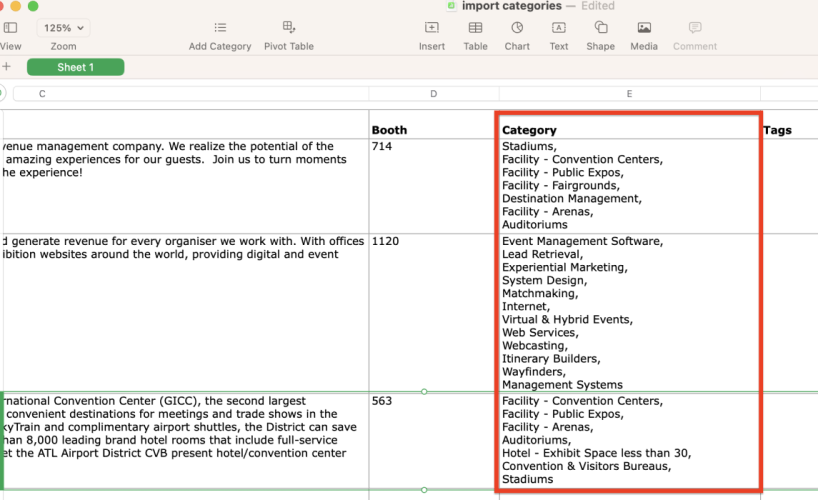
Via Excel
You can import categories along with other exhibitor data via the Excel template. They will be assigned to exhibitors automatically. Please note that categories should be comma-separated.
Assigning categories
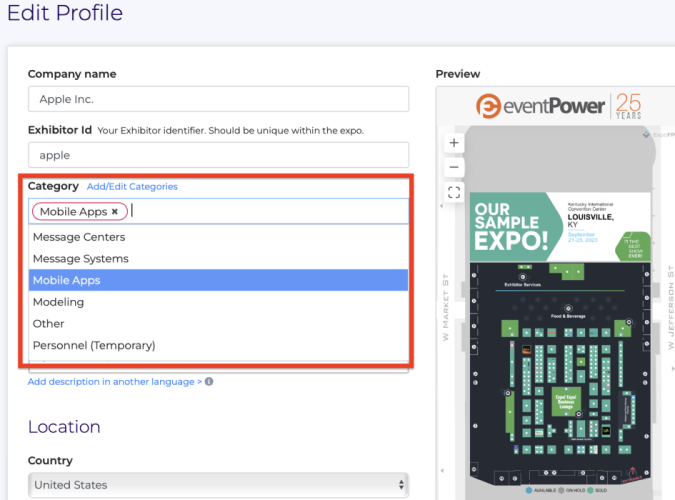
With the Exhibitor Portal
Exhibitors can assign themselves to a category in their portal by clicking Edit profile - Category.
Individually and in bulk
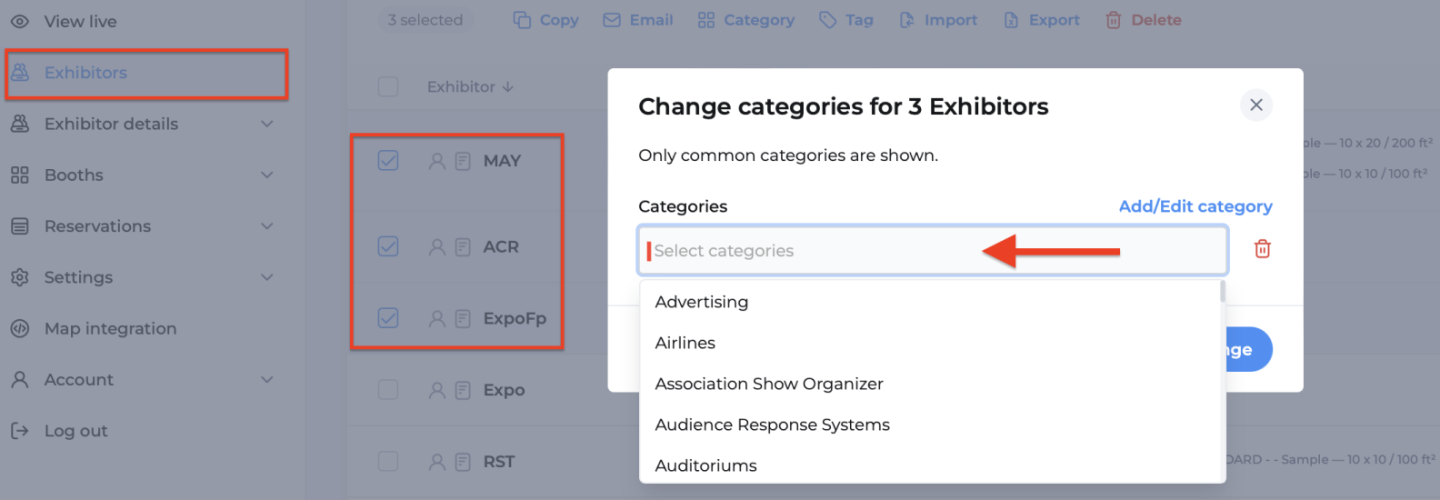
To (un)assign categories, go to Exhibitors - Exhibitors list, select one or multiple exhibitors, click on Category and select the correct one.
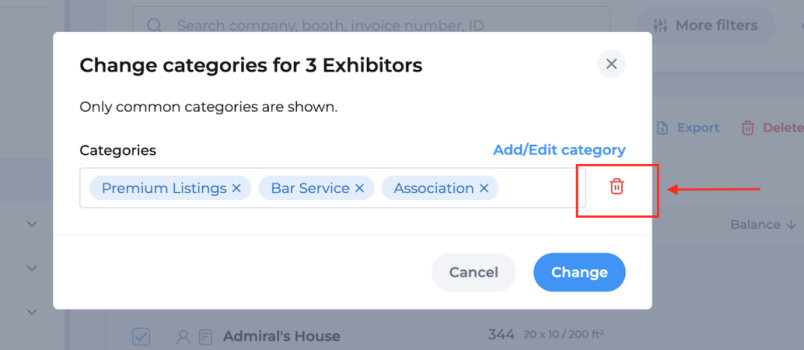
In a similar way, you can delete categories of the selected exhibitors — individually or all.
See also: How to use exhibitor tags.