How to design a floor plan
In this article, you can learn how to work with basic designing tools, create booths and draw objects. Alternatively, you can have your floor plan professionally designed by our team in 5–7 business days.
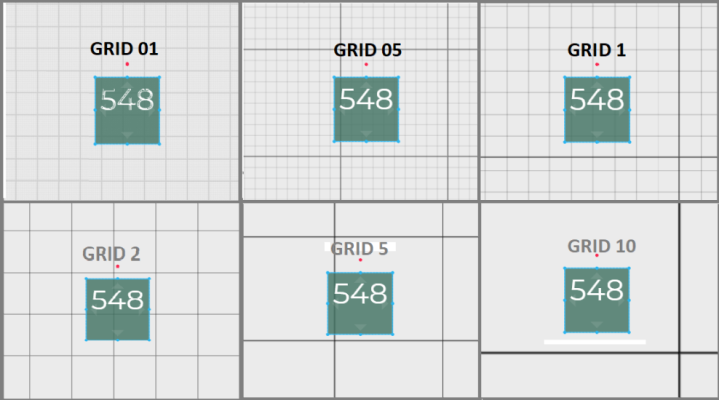
Adjusting measurement unit and grid
At the bottom right corner of the Designer  , you'll see a window to switch between meters and feet. The same window allows you to choose the grid size: 0.1, 0.5, 1, 2, 5 or 10.
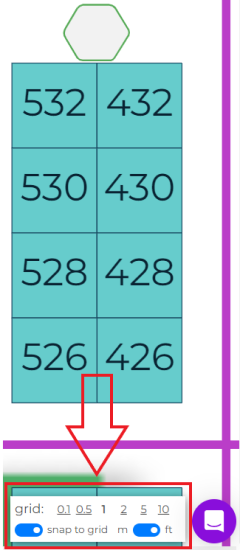
A larger grid size will help you align bigger objects, while a smaller grid helps you align elements with better precision.
Using basic tools
The Select tool allows you to drag your mouse over one or more objects to select them.

The Pan tool lets you click and drag to move objects around the grid.

This tool will Undo/Redo a movement. (Shortcuts: Ctrl + Z and Ctrl + Y)

This tool will Copy/Paste any selected object. (Shortcuts: Ctrl + C and Ctrl + V)

This tool will Flip an object horizontally or vertically.

This tool will Rotate an object. Holding Ctrl makes objects rotate around their own axis.

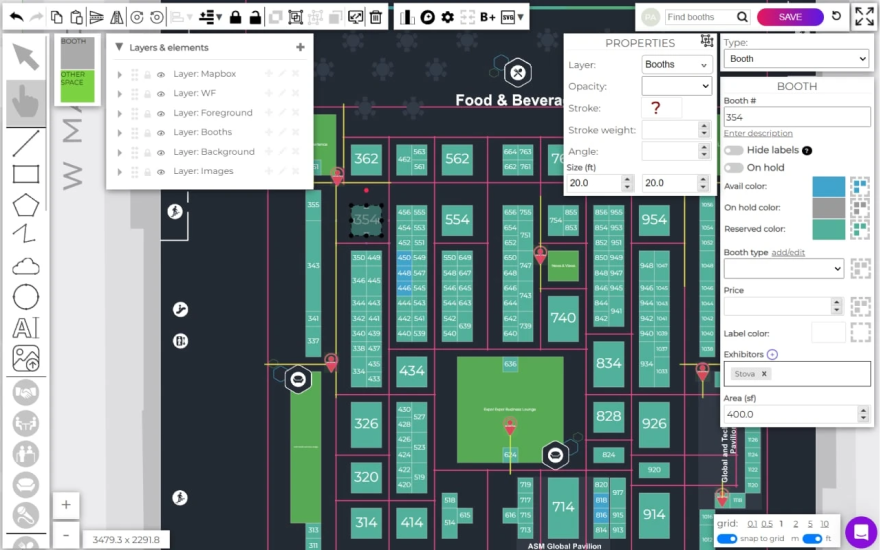
Working with booths
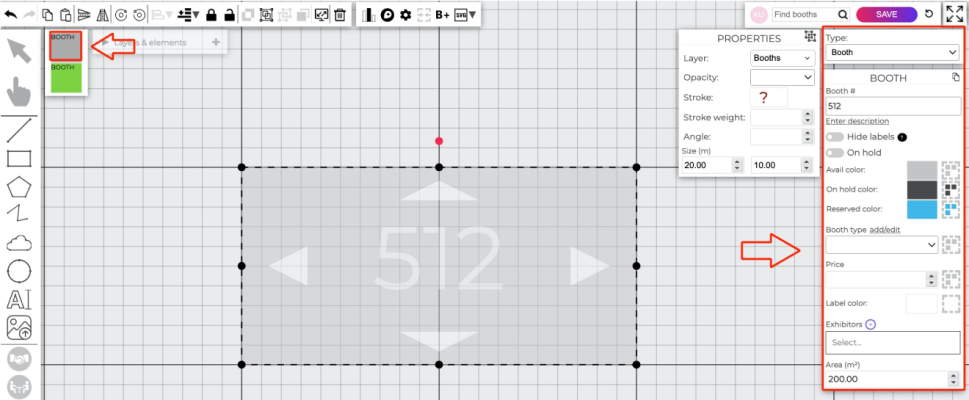
How to add and edit a booth
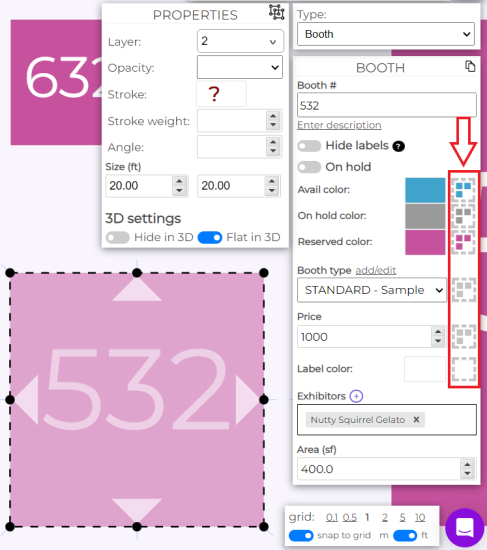
To add a booth, click and drag it from the toolbar. A default booth is 10 x 10 ft (3 x 3 m). Click on the booth to move it or resize it. You'll also see the pop-up window on the left with booth properties, where you can rename a booth, assign its type and add a price or an exhibitor to it.
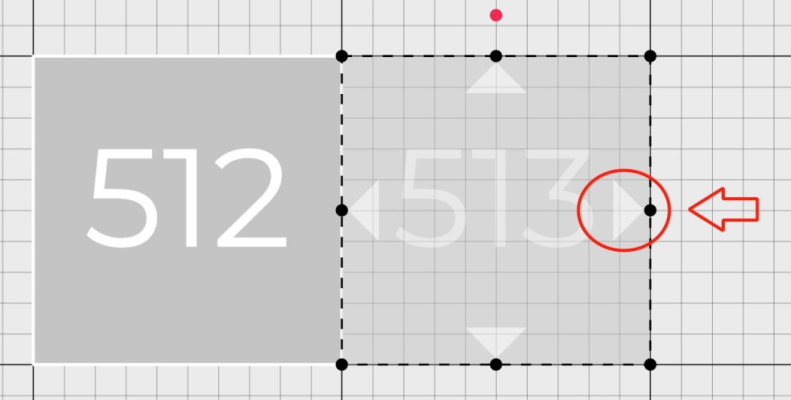
If you click the arrows on the booth, the new booth will be named sequentially and perfectly aligned.
Read how to create an L-shaped booth here.
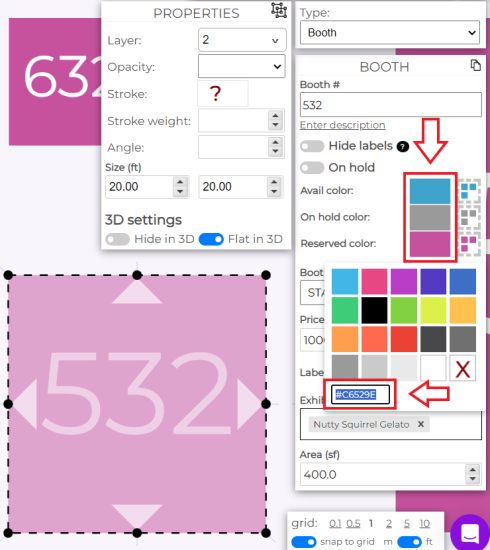
How to customize booth colors
Using hex color codes, you can customize booth colors. Copy and paste any color code, and you can customize available, on hold, and sold colors in booth properties.
Editing booths in bulk
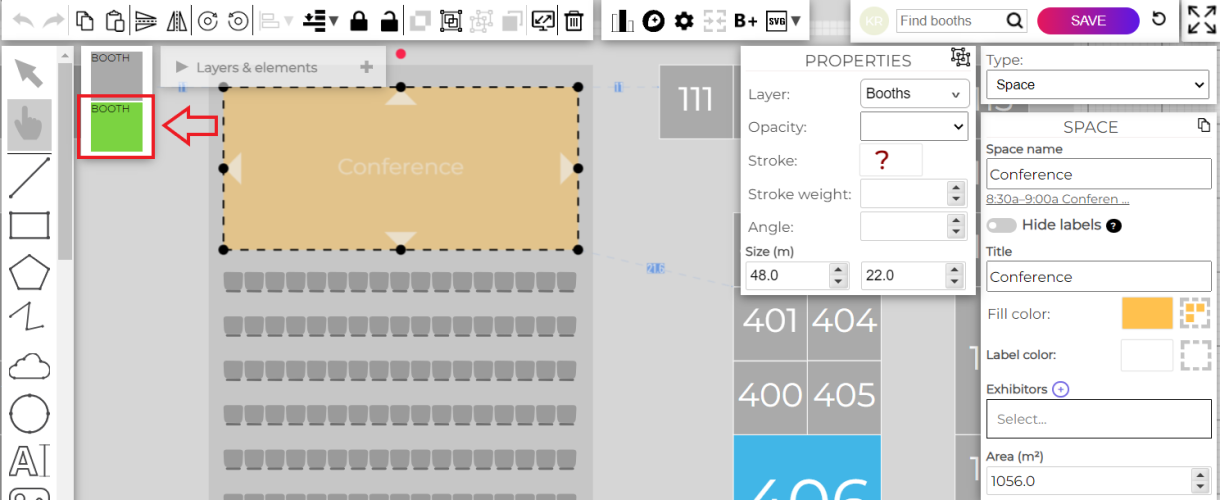
How to select a group of similar booths
If you want to edit all booths of a specific color, type or price, click on one booth and then click the Select all such booths button on the right. Any changes will be applied to all selected booths.
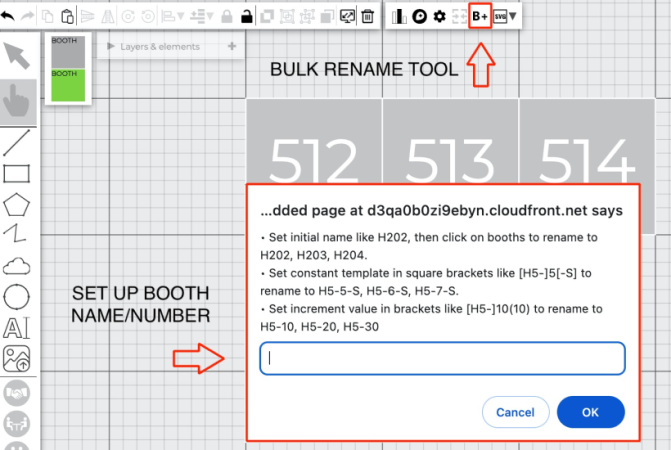
How to rename booths in bulk
If you need to rename all your booths, you can use the Bulk rename tool. Click the tool, enter the starting booth name/number, and then click on multiple booths one by one to rename them in order.
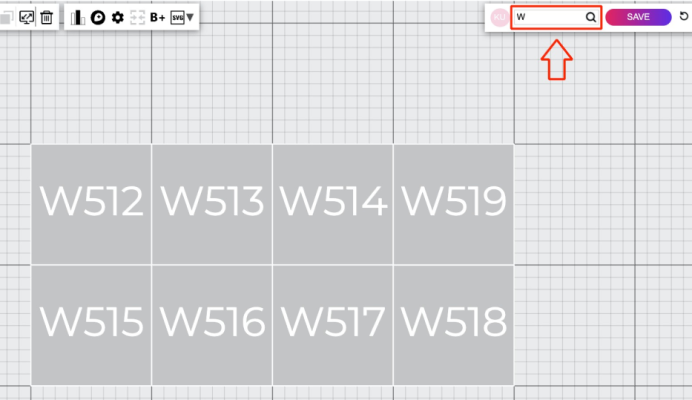
How to search for a booth
The search bar allows you to search for one or multiple booths by name, and they will be highlighted.
Working with stages and other spaces
Other spaces are used for stages, conference rooms, food courts, etc. It is possible to add descriptions and show schedules for such spaces. Exhibitors cannot reserve them but the organizer can manually assign a specific company or sponsor to any other space.
How to add other spaces
You can drag and drop other spaces in a similar way as you do booths — choose the green booth icon under the grey one on the toolbar:
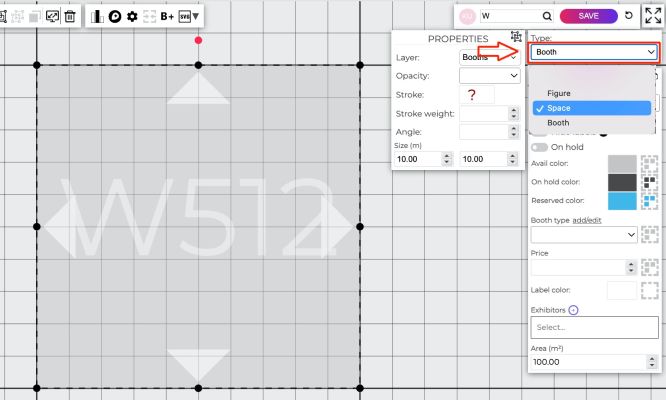
You can also convert an existing booth into the other space. To do that, click on it and change the type in the booth properties window:
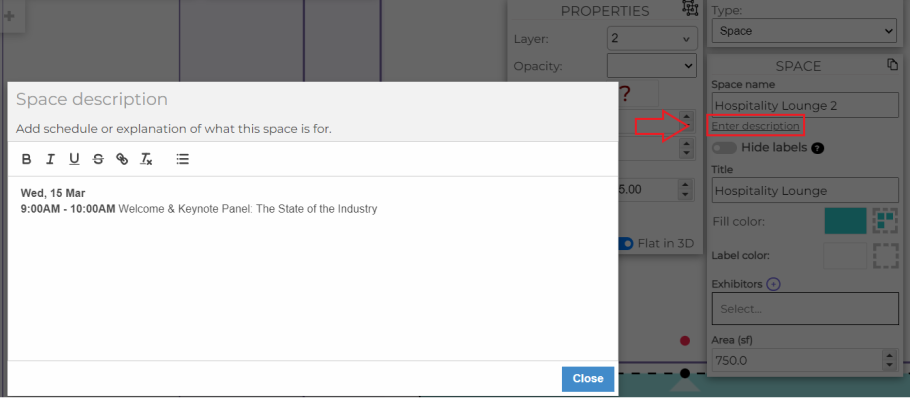
How to add descriptions and schedules
To add a description or a stage schedule, click on the space, then click Enter description. You can add a text and/or hyperlink it if you have any online seminars.
How to show a sponsor of other spaces
You can highlight a sponsor of a particular space or a pavilion by adding their icon and (optionally) text with the company name directly on the space or next to it.

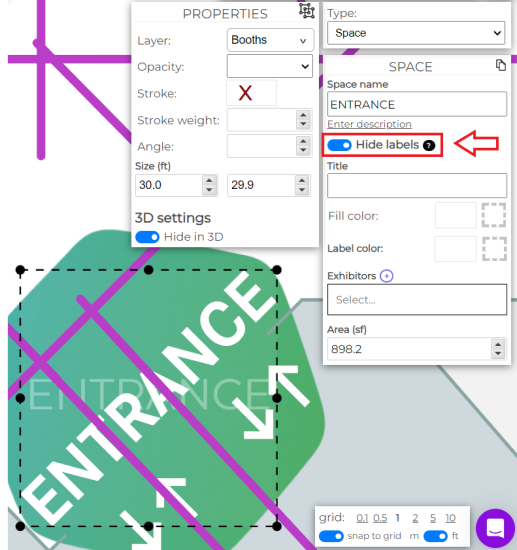
It's also possible to hide the space's name and only leave the text if you toggle Hide labels in the space properties.
Adding images and logos
You can add an event logo and custom icons to your plan. It's also possible to upload a background image (PDF, PNG, JPEG, etc.).
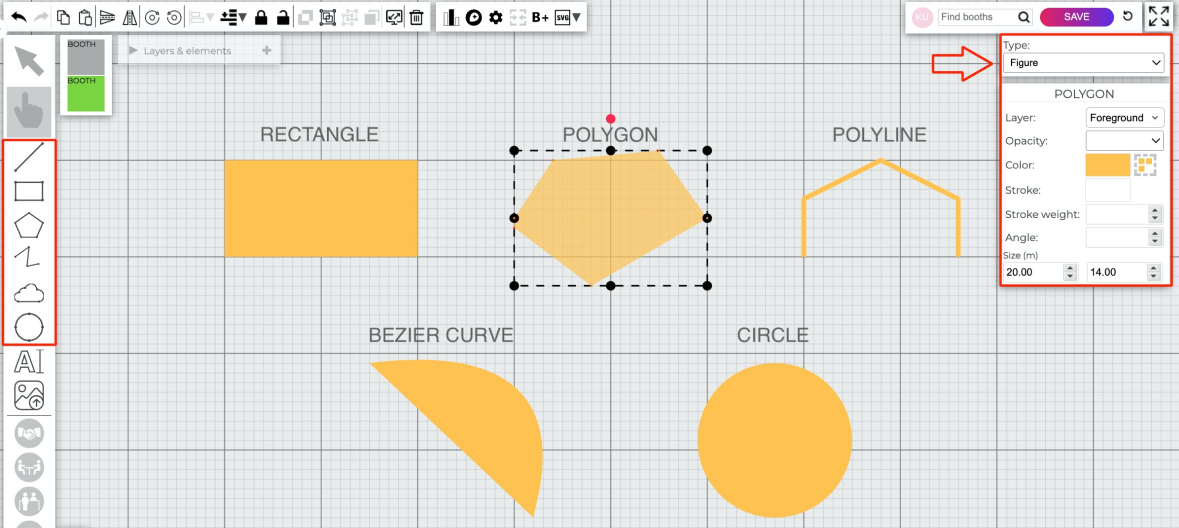
Working with background shapes
These tools are used to create different shapes for the floor plan backgrounds, pavilion outlines, walls, columns, etc. You can resize any shape by clicking and dragging the blue dotted corners or changing parameters in the object properties.
Working with text
You can add text to your plan for aisles or entrances or make a map legend. You can also customize the font, size and color.
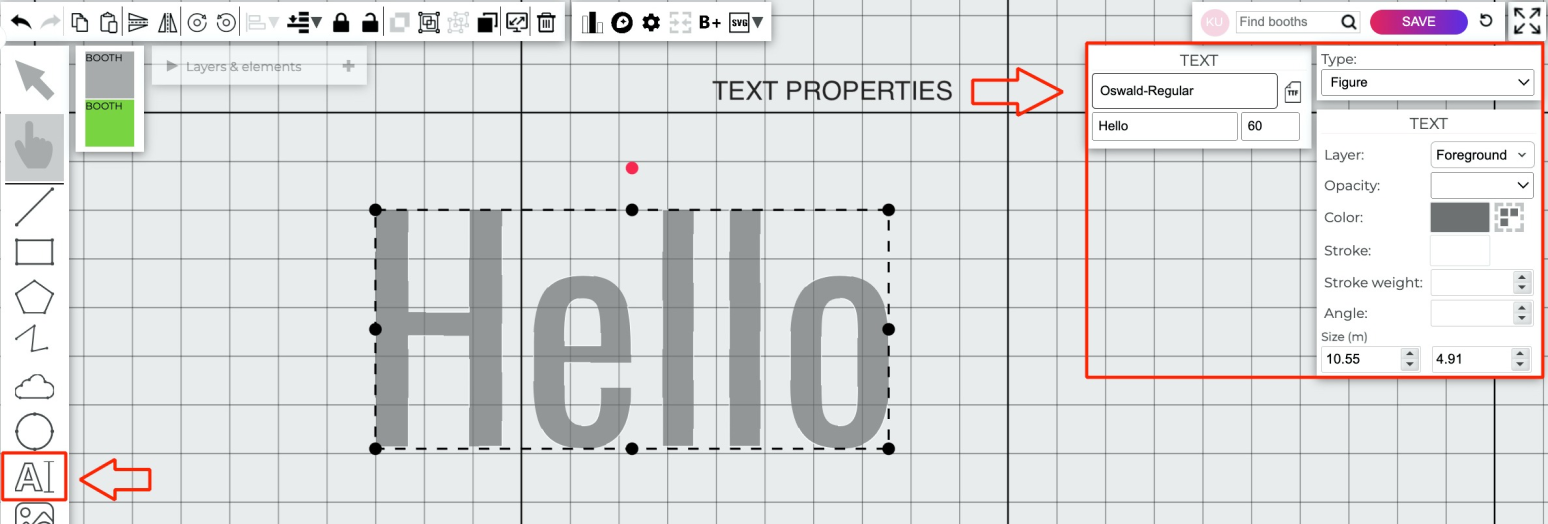
How to change the font
You can customize the font of the background text, booths and other spaces.
Version history
Don’t forget to save your progress by hitting the Save button. All versions are saved, and you can return to a previous version anytime by clicking the round arrow beside it.
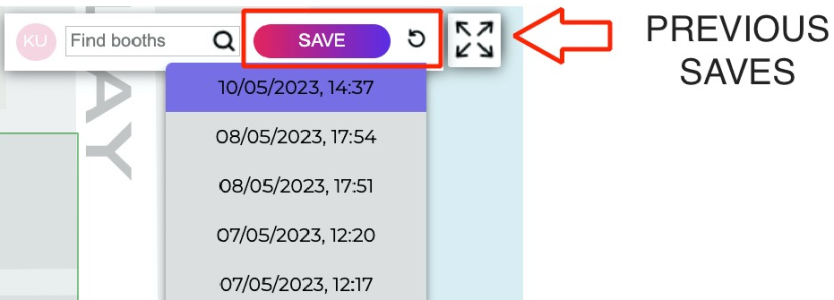
Hover over the version history to see the email of the teammate who saved this version.