Exhibitor Portal
Exhibitors can see and manage their reservations and profiles in the Exhibitor Portal.
It's available with the Maps and Exhibitors or Maps, Exhibitors and Payments package.
Benefits of the Portal (and what exhibitors can do there)
- Managing reservations
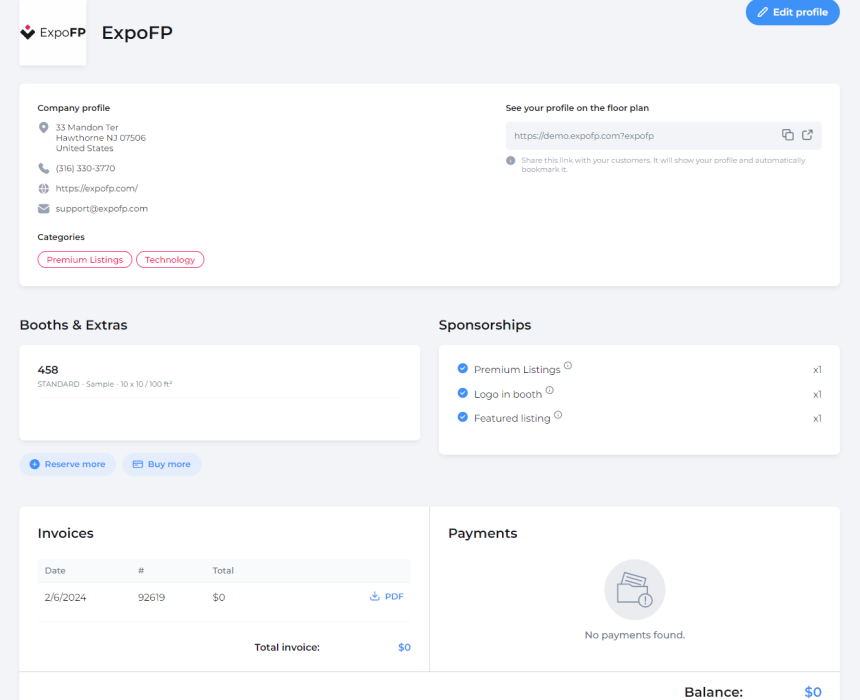
Exhibitors can reserve additional booths, sponsorships and booth extras, including our built-in sponsorship options: Logo in Header, Logo in Booth and Featured Listings.
- Editing company profile
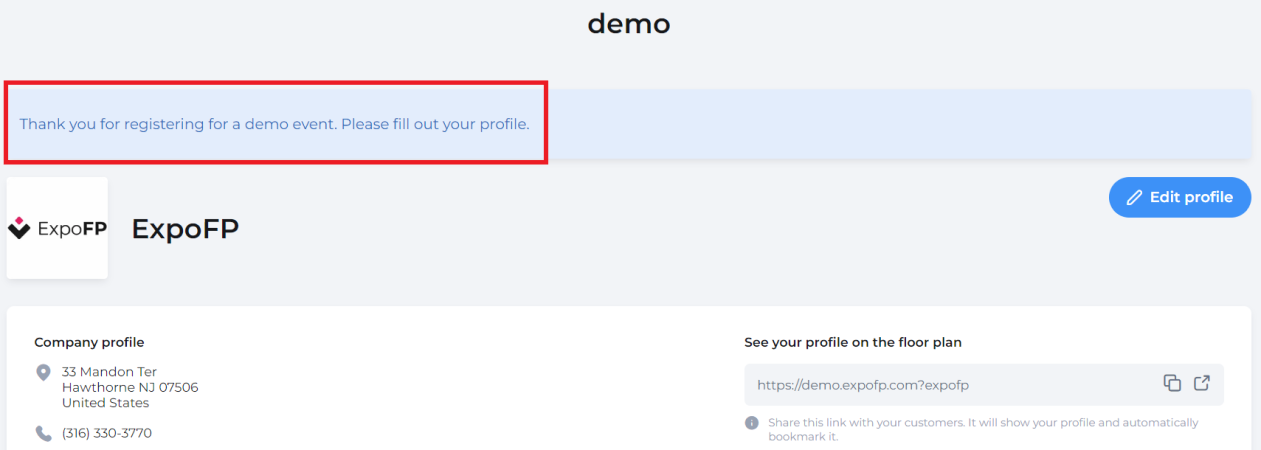
Exhibitors can fill out their company’s information (description, address, etc.) and attach links to social media. They can also add marketing materials, images or videos and action buttons. Company profiles are more complete and accurate since they are filled out by the exhibitors. You will still have access to all the information and can edit it as necessary.
Note: you can restrict which fields exhibitors can access and upsell others with listing levels.
- Online payments
Exhibitors can see, download and pay for their invoices. They can also see their payment history and the remaining balance in the “Payments” section.
Note: if you don’t want to use our invoices and online payments, write to us and we will disable this section.
- Sharing profiles
Exhibitors can see a preview of their profile and share it on social media.
- Easy auto-login
Exhibitors can access their Exhibitor Portal via the auto-login link. It doesn’t require creating an account or a password on our website.
- Preview of a company’s profile
Organizers can preview a company’s profile on the floor plan. To do that, go to the Exhibitors tab, choose a company, and click the “Edit profile” button on the top right corner.
What exhibitors can’t do in the Exhibitor Portal
Exhibitors can’t regenerate their auto-login link, see any admin notes, tags that the organizer has assigned to them or the change history. They can't delete their reservations either; only the organizer controls that.
How exhibitors can get the auto-login link to Portal
With the reservation confirmation email
If you allow exhibitors to reserve or buy booths through the floor plan, exhibitors receive the auto-login link along with the reservation confirmation email by default. See more on ExpoFP emails.
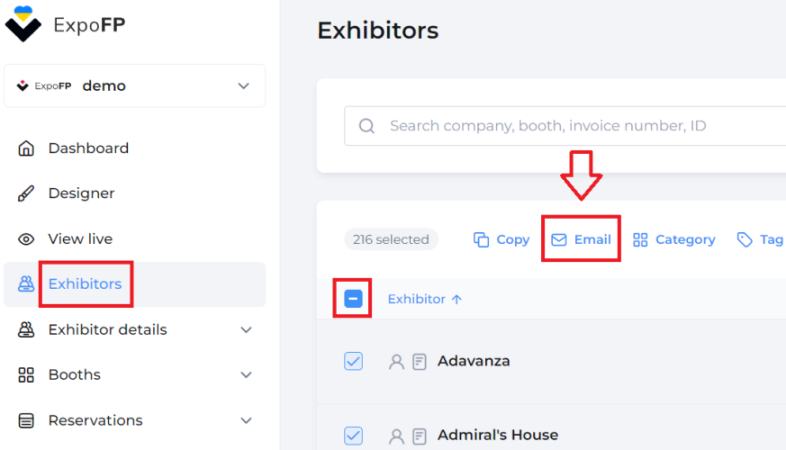
From the exhibitor page
You can send this link to a particular company. Go to Exhibitors  . Choose the necessary one, then click the “email auto-login link” icon.

Mass emailing
You can mass email the auto-login link to all exhibitors (or use filters on the Exhibitors page to select certain ones) using the #AutoLoginLink# variable.
You’ll need to configure your mail server first.
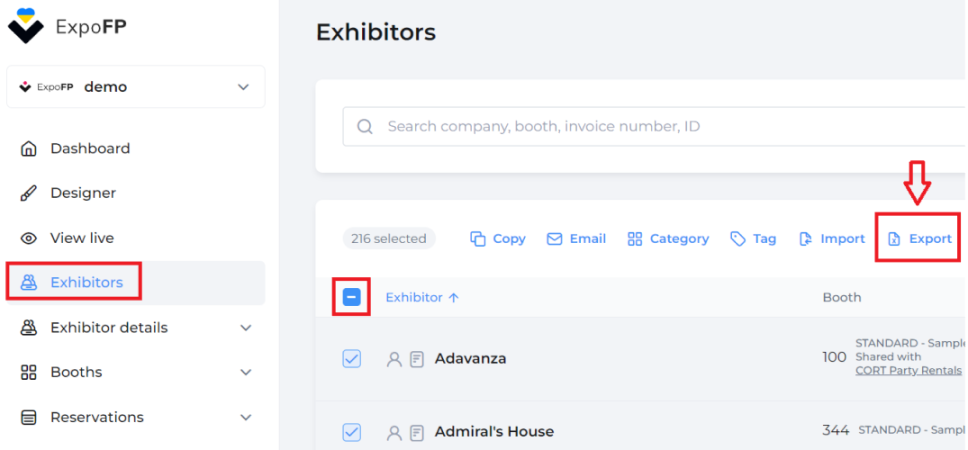
Sending links with the 3rd party service
You can export all the auto-login links on the Exhibitors page. Select all exhibitors with the box at the top of the list and then click Export. The exported Excel file will contain all the information on the exhibitors, including auto-login links. Then, you can send them with the 3rd party service for mass-mailing (e.g., GMass).
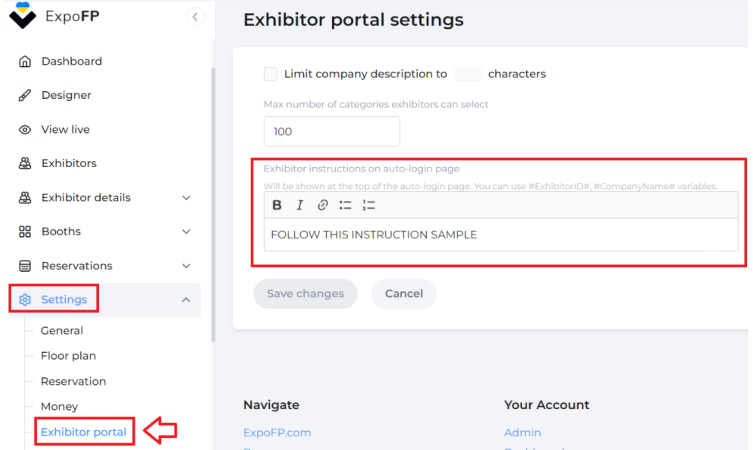
How to add instructions for exhibitors
You can provide your exhibitors with specific instructions on how to fill out their profiles.
To do that, go to Settings  - Exhibitor Portal. There you can also limit the company description to a certain number of characters as well as the number of categories the exhibitors can assign to themselves.
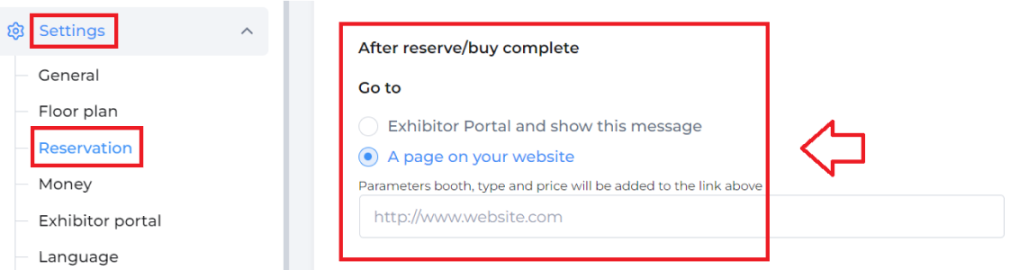
How to disable the Exhibitor Portal
If you don’t want to use our Portal, you can redirect exhibitors to your own website page. Go to Settings - Reservation, scroll down to “After reserve/buy complete” and insert the link into the field.
See also: how to import exhibitors.