Advanced designer tools
In this article you will learn how to use advanced Designer tools to create a floor plan. Alternatively, you can have your floor plan professionally designed by our team in 5–7 business days.
Adding a booth description
You can add a description for available booths in the “Booth reservation” section on your Dashboard  . It will apply to all available booths. See more details here.

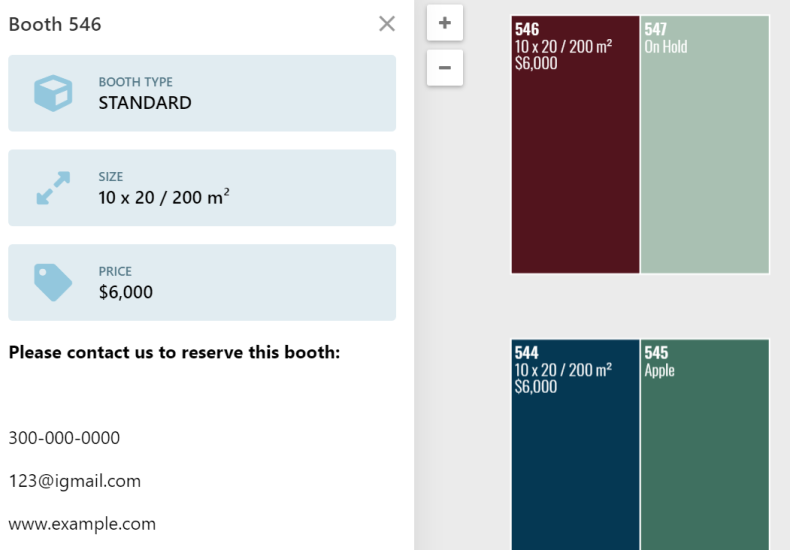
The description, size, price and booth type will be displayed on the available booth in the floor plan like this:
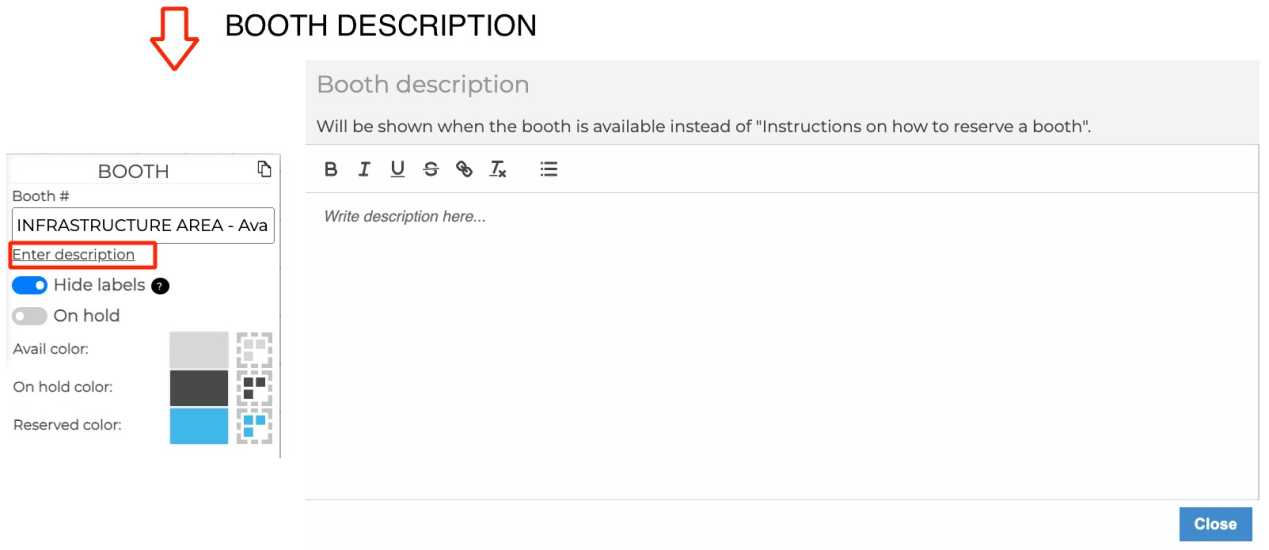
Set individual booth descriptions on the Designer by clicking on the booth and then on Enter description.
Working with background shapes
How to group background shapes
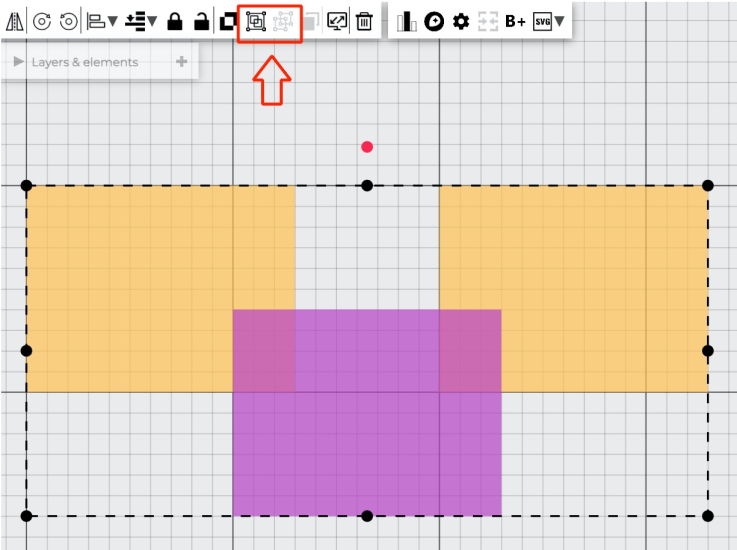
Select the objects you would like to group and click the Group tool. To ungroup, use the Ungroup tool. (Shortcut: Ctrl + G)
How to draw irregular shapes
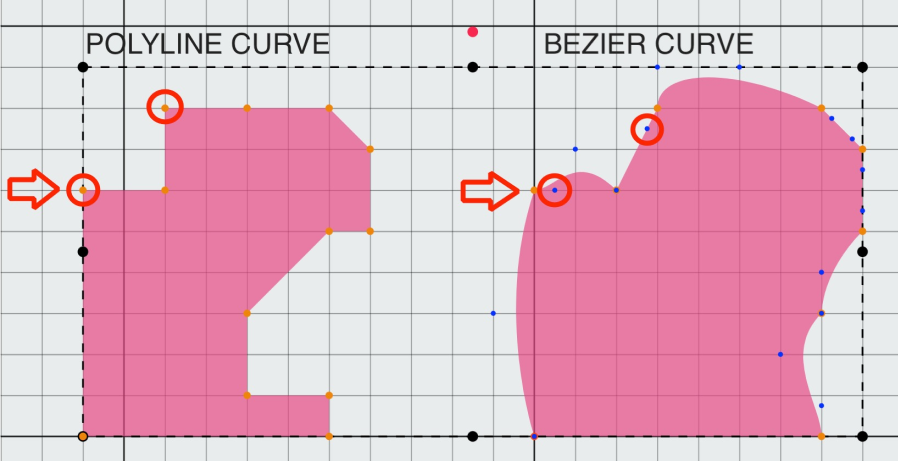
With the Polyline and Bézier curve tools, you can draw irregular shapes.
By clicking and dragging the black nodes on the Bézier shape, you add curves to the lines you want rounded. After making a polyline or Bézier curve shape, you can move around the yellow nodes to modify it.
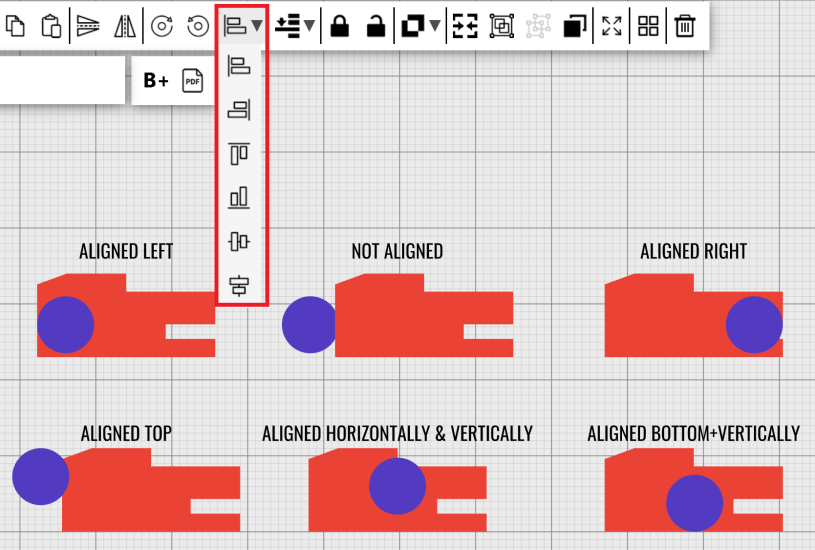
How to use the align tool
You can use the Align tool if you need two or more objects to align a certain way in relation to each other.
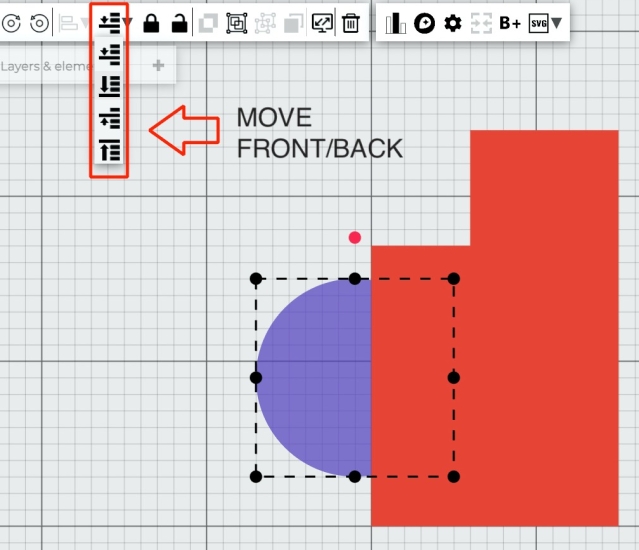
How to move an object front/back
You can use this tool if you need to move one object so that it shows on top of another. Booths are always shown on top, so you aren't able to put any objects on top of booths.
Locking objects
Locked objects can't be moved on the floor plan. To use this option, click on the object, and then click the Lock tool.
To unlock it, click the unlock tool or double click the object.

Working with icons
Add icons from the toolbar (or upload your own) and customize the color and size of each one. To make the icon stand out better, you can add a colorful background.
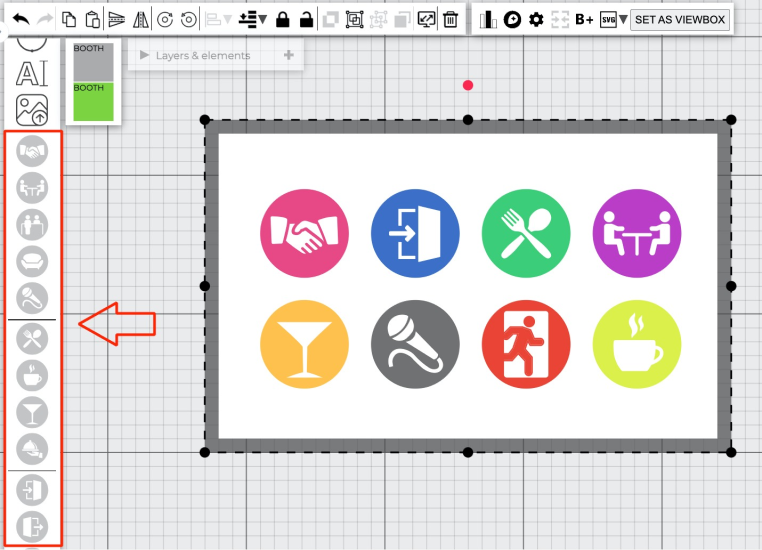
You can also turn the icon into a clickable object using layers.
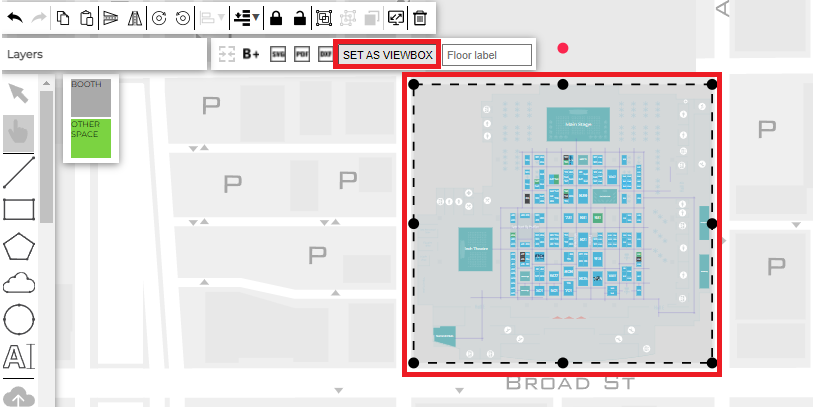
Adding a viewbox
A viewbox determines the area that will be shown once the floor plan loads.
To add a viewbox, create a rectangle on top of the area you would like to display and click on SET AS VIEWBOX.
Drawing wayfinding
Wayfinding helps to see where exhibitors, conference rooms, booths and restaurants are located on a plan and gives routing directions. See how to create it yourself here (or have our team create it for you).
Working with layers
Each layer in the Designer serves a specific role, and understanding their functions will help you create professional-looking floor plans. They can also help you create multi-level floor plans and multi-floor wayfinding. See more details here.
Booth statistics
You can see statistics on the number of your regular and irregular POIs, as well as a drop-down of Available, On Hold and Reserved booths. Click on the Statistics tool on the toolbar at the top:
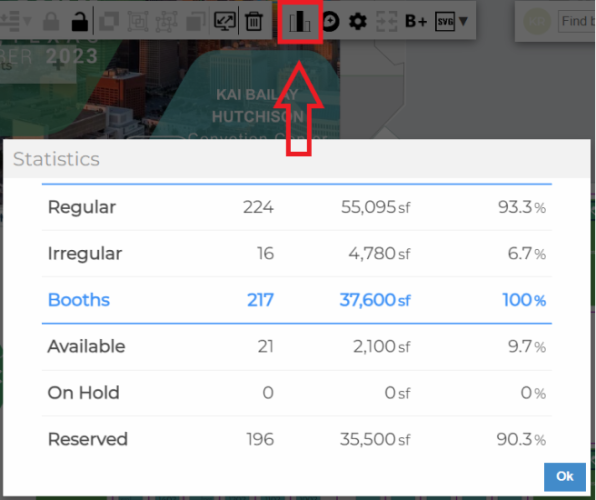
More details can be found in Booths  - Booth list and in Reports - Booth stats.